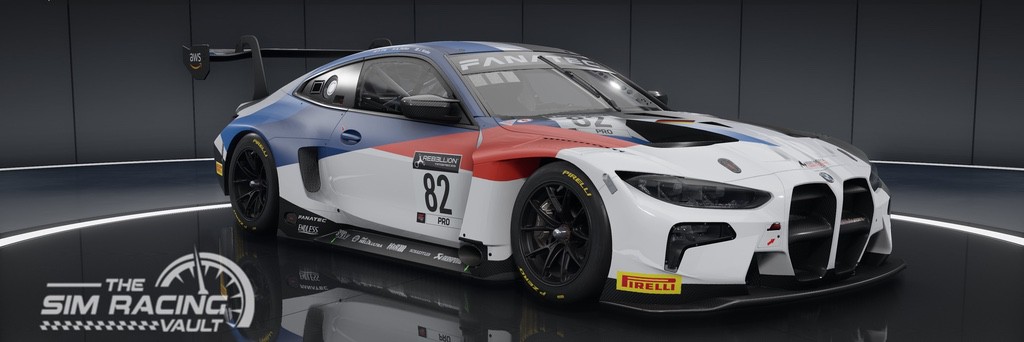
Generic info:
Last updated: 2022-11-30
Media:
Not available
System information:
Xbox Assetto Corsa Competizione 1.8
Conditions:
Type: Race
Weather: Dry
Weather: Dry
Tire pressure is an indication, this is highly depending on track and ambient temperature.
For best settings drive 4-5 laps and see if you can get tire pressure between the following ranges:
For best settings drive 4-5 laps and see if you can get tire pressure between the following ranges:
| Class | Dry (V1.9 or higher) | Wet |
|---|---|---|
| GT3/GT4 | 26.0 - 27.0 PSI | 29.5 - 31.0 PSI |
Front Left
| Pressure | 25.00 PSI172.37 KPa |
|---|---|
| Toe | -0.18° |
| Camber | -4.00° |
| Caster | 9.70° |
Front Right
| Pressure | 26.60 PSI183.4 KPa |
|---|---|
| Toe | -0.18° |
| Camber | -4.00° |
| Caster | 9.70° |
Rear Left
| Pressure | 25.70 PSI177.2 KPa |
|---|---|
| Toe | 0.00° |
| Camber | -3.50° |
Rear Right
| Pressure | 27.20 PSI187.54 KPa |
|---|---|
| Toe | 0.00° |
| Camber | -3.50° |
Electronics
| TC | 9 |
|---|---|
| ABS | 5 |
| ECU Map | 1 |
| TC2 | 0 |
Fuel and Brakes
| Fuel load | 50 Liters |
|---|---|
| Tyre type | Dry |
| Front brake pads | 1 |
| Rear brake pads | 1 |
Generic Brakepad information:
There are four break pads, each with a different behavior and use case. You can see the best practice in the table to the right. We do not recommend using Pad #4 for hotlap/racing usage. This pad excessively wears out already in a few laps. A use case could be to use it for break pad wear testing purposes.
| Condition | GT3 | GT4 |
| Hotlap | Pad 1 | Pad 1 |
| Qualifying | Pad 1 | Pad 1 |
| Short Dry Race | Pad 1 | Pad 2 |
| Long Dry Race | Pad 2 | Pad 2 |
| Damp | Pad 2 | Pad 2 |
| Wet | Pad 2 | Pad 2 |
| Full wet | Pad 3 | Pad 2 |
Front
| Antiroll bar | 5 |
|---|---|
| Brake power | 100.00 % |
| Break bias | 53.90 % |
| Steer Ratio | 13 |
Front Left
| Wheel Rate | 105000 N/m |
|---|---|
| Bumpstop rate | 200 N |
| Bumpstop range | 8 |
Front Right
| Wheel Rate | 105000 N/m |
|---|---|
| Bumpstop rate | 200 N |
| Bumpstop range | 8 |
Rear Left
| Wheel Rate | 90000 N/m |
|---|---|
| Bumpstop rate | 200 N |
| Bumpstop range | 60 |
Rear Right
| Wheel Rate | 90000 N/m |
|---|---|
| Bumpstop rate | 200 N |
| Bumpstop range | 60 |
Rear
| Antiroll bar | 2 |
|---|---|
| Preload Differential | 170 N/m |
Front Left
| Bump | 10 |
|---|---|
| Fast bump | 12 |
| Rebound | 30 |
| Fast rebound | 19 |
Front Right
| Bump | 10 |
|---|---|
| Fast bump | 12 |
| Rebound | 30 |
| Fast rebound | 19 |
Rear Left
| Bump | 7 |
|---|---|
| Fast bump | 11 |
| Rebound | 30 |
| Fast rebound | 23 |
Rear Right
| Bump | 7 |
|---|---|
| Fast bump | 11 |
| Rebound | 30 |
| Fast rebound | 23 |
Aero
Rear
| Ride Height | 71 mm |
|---|---|
| Rear Wing | 8 |
| Brake ducts | 3 |
Front
| Ride Height | 56 mm |
|---|---|
| Splitter | 0 |
| Brake ducts | 3 |
Gearshift Mapping
This visual map is based on the observations of the onboard video we have from this setup. It is not 100% acurate but gives a good impression what gear the driver used in the various sections of the track. The mapping is done manual by TheSimRacingVault.com.
